Documentation
Welcome to the Node-RED Skill for Amazon Alexa Bridge documentation
Create Account
Before you start the first thing that needs to be done is to create an account on this site. You can do this by clicking here
After you have created an account you need to define some devices to control. Once you are logged in a "Devices" tab should appear in the menu at the top of the page. From here you can add new, edit or delete existing devices.
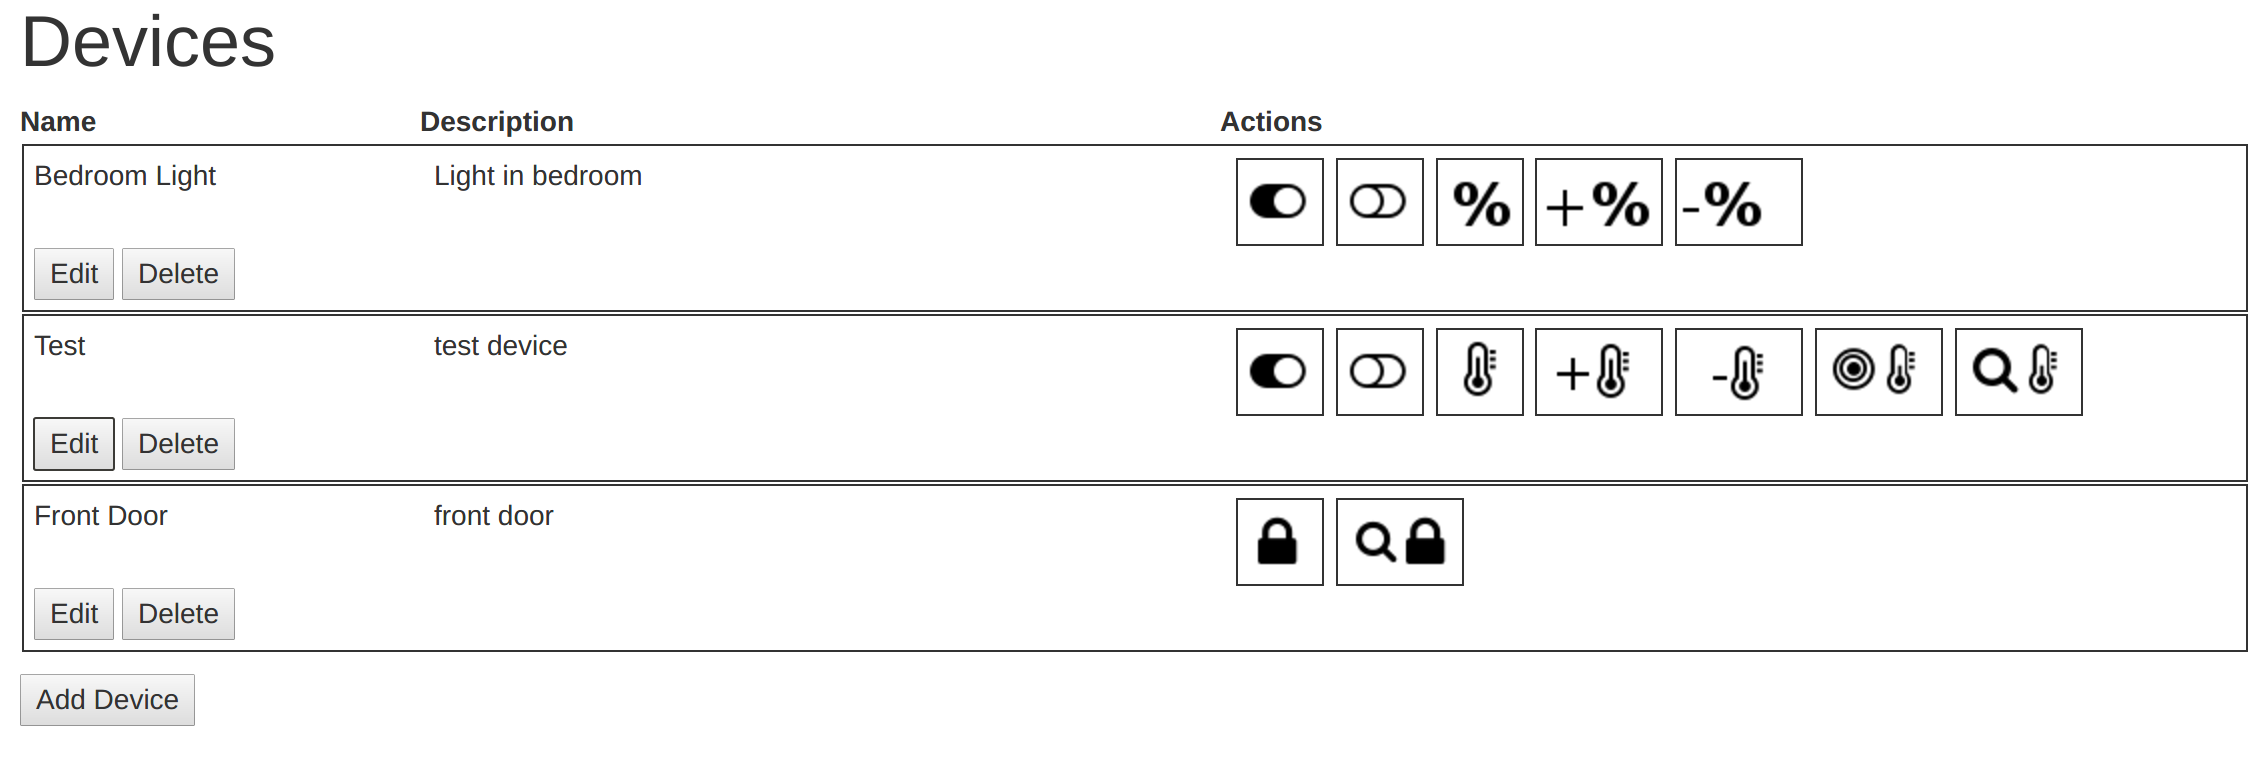
The name you give to the device will be how you access it from Alexa, be careful with names like "Livingroom" that may be interpreted as "Livingroom" or "Living room".
Link Account
Once you have an account you need to add the Skill to your Alexa powered device. You can do this from Alexa app on your phone/tablet by searching for 'Node-RED' in the Skills section. Once enabled you will be asked to link your account. This will ask for the same username and password you used when you created the account here.
Once the accounts are linked you can discover the devices you declared earlier. You can do this from within the app or by saying "Alexa, discover devices".
Install Nodes
Now that the Echo side of things is all setup it's time to set up Node-RED.
node-red-contrib-alexa-home-skill provides the end point node to bring your commands into Node-RED.
There are serveral ways to install new nodes into Node-RED. There is detailed documentation on how to install nodes on the Node-RED website here, but here's a quick version.
The simplest is to use the installer built into the Node-RED admin UI. You do this by clicking on the menu icon in the top right hand corner, then selecting "Manage pallette". Then on the left hand side select install, type "node-red-contrib-alexa-home-skill" in the box. Finally click on the install button for the node in the list.
You can also install the nodes from the command line
cd ~/.node-red
npm install node-red-contrib-alexa-home-skill
And finally if you are embedding Node-RED into your own application you can add the node to the package.json file for your project and it will be included when you do an install.
...
  "dependencies": {
    "node-red": "~0.15.x",
    "node-red-contrib-alexa-home-skill": "*",
...
Configure Nodes
You can find the Alexa Home Skill nodes in the alexa section of the Node-RED pallette.
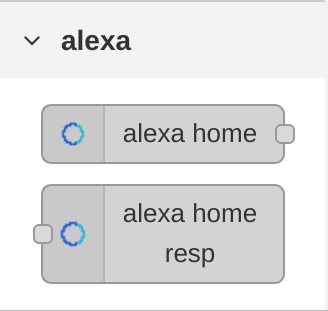
Once you've dragged a Alexa Home node on to the canvas, configuring it is relatively simple
- Click on the pencil at the end of the Accounts line to add a new account1
-
Enter your username and password
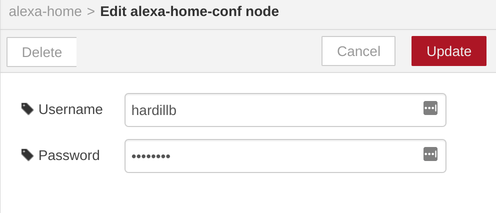
- Click OK to return to the node config
-
The devices drop down should now be populated with the devices you defined earlier, if not hit the refresh button at the end.
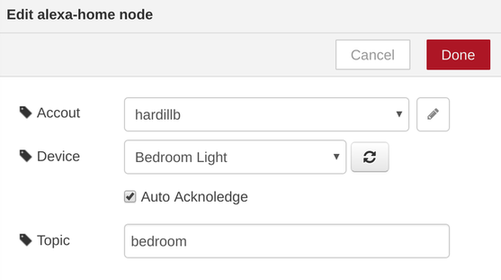
To start with leave the Auto Acknoledge checked, this tells Alexa that the command has succeeded as soon as it is received by Node-RED. If you want to report failures then you can uncheck this option and user the Alexa Home Resp node to signal sucess or failure. Details about the Alexa Home Resp node are in the Building Flows section of the documentation.
Building Flows
Alexa Home
The Alexa Home node supports the following commands, click on the command name to see a sample output message or toggle all by clicking here:
- TurnOnRequest
{ '_messageId': 'd6734865-6a96-4967-8504-6056e75ba5c3', '_applianceId': '3', '_confId': 'cc670790.9f0eb8', 'command': 'TurnOnRequest', 'extraInfo': {}, 'payload': true } - TurnOffRequest
{ '_messageId': 'd6734865-6a96-4967-8504-6056e75ba5c3', '_applianceId': '3', '_confId': 'cc670790.9f0eb8', 'command': 'TurnOffRequest', 'extraInfo': {}, 'payload': false } - SetPercentageRequest
{ '_messageId': 'd6734865-6a96-4967-8504-6056e75ba5c3', '_applianceId': '3', '_confId': 'cc670790.9f0eb8', 'command': 'SetPercentageRequest', 'extraInfo': {}, 'payload': 50 } - IncrementPercentageRequest
{ '_messageId': 'd6734865-6a96-4967-8504-6056e75ba5c3', '_applianceId': '3', '_confId': 'cc670790.9f0eb8', 'command': 'IncrementPercentageRequest', 'extraInfo': {}, 'payload': 10 } - DecrementPercentageRequest
{ '_messageId': 'd6734865-6a96-4967-8504-6056e75ba5c3', '_applianceId': '3', '_confId': 'cc670790.9f0eb8', 'command': 'DecrementPercentageRequest', 'extraInfo': {}, 'payload': -10 } - SetTargetTemperatureRequest
{ '_messageId': 'd6734865-6a96-4967-8504-6056e75ba5c3', '_applianceId': '3', '_confId': 'cc670790.9f0eb8', 'command': 'SetTargetTemperatureRequest', 'extraInfo': {}, 'payload': 22 } - IncrementTargetTemperatureRequest
{ '_messageId': 'd6734865-6a96-4967-8504-6056e75ba5c3', _applianceId': '3', '_confId': 'cc670790.9f0eb8', 'command': 'IncrementTargetTemperatureRequest', 'extraInfo': {}, 'payload': 5 } - DecrementTargetTemperatureRequest
{ '_messageId': 'd6734865-6a96-4967-8504-6056e75ba5c3', '_applianceId': '3', '_confId': 'cc670790.9f0eb8', 'command': 'DecrementTargetTemperatureRequest', 'extraInfo': {}, 'payload': -5 } - GetTemperatureReadingRequest 2,3
{ '_messageId': 'd6734865-6a96-4967-8504-6056e75ba5c3', '_applianceId': '3', '_confId': 'cc670790.9f0eb8', 'command': 'GetTemperatureReadingRequest', 'extraInfo': {} } - GetTargetTemperatureRequest 2,3
{ '_messageId': 'd6734865-6a96-4967-8504-6056e75ba5c3', '_applianceId': '3', '_confId': 'cc670790.9f0eb8', 'command': 'GetTargetTemperatureRequest', 'extraInfo': {} } - SetLockStateRequest 1
{ '_messageId': 'd6734865-6a96-4967-8504-6056e75ba5c3', '_applianceId': '3', '_confId': 'cc670790.9f0eb8', 'command': 'SetLockStateRequest', 'extraInfo': {}, 'payload': 'LOCKED' } - GetLockStateRequest 1,3
{ '_messageId': 'd6734865-6a96-4967-8504-6056e75ba5c3', '_applianceId': '3', '_confId': 'cc670790.9f0eb8', 'command': 'GetLockStateRequest', 'extraInfo': {} } - SetColorRequest 1
{ '_messageId': 'd6734865-6a96-4967-8504-6056e75ba5c3', '_applianceId': '3', '_confId': 'cc670790.9f0eb8', 'command': 'SetColorRequest', 'extraInfo': {}, 'payload': { 'hue': 0.0, 'saturation': 1.0000, 'brigtness': 1.0000 } } - SetColorTemperatureRequest 1
{
  '_messageId': 'd6734865-6a96-4967-8504-6056e75ba5c3',
  '_applianceId': '3',
  '_confId': 'cc670790.9f0eb8',
  'command': 'SetColorTemperatureRequest',
  'extraInfo': {},
  'payload': 2700
}
- Amazon documentation say only available to US users at the moment
- Amazon documentation say only available to US & UK users at the moment
- Can not be Auto Acknowledged as they need to return a value
The payload field will hold positive numbers for the Set and Increment versions of commands and negative numbers for the Decrement versions. For TurnOn/TurnOff the payload will be true/false
With this you can build a flow to turn a light on for a specific length of time or until turned off:
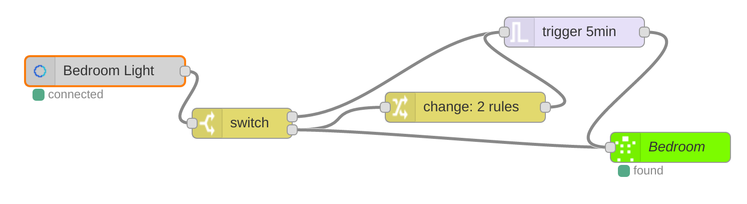
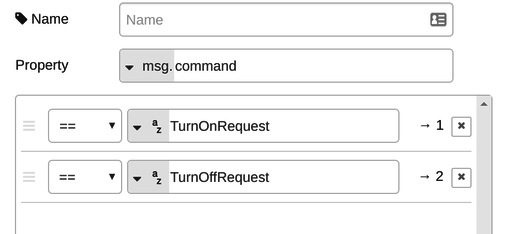
The Switch node works out which command was used:
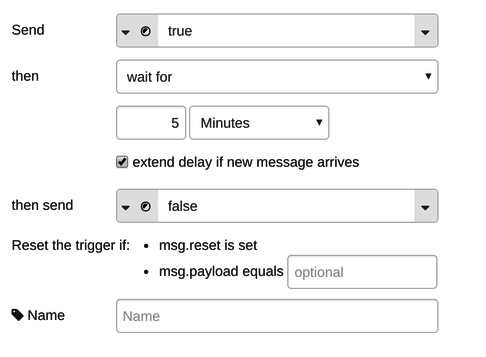
The Trigger node sets the length of time the light should be on for:
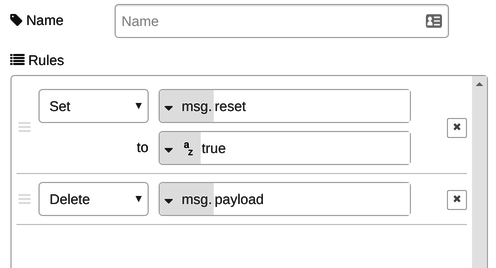
The Change node resets the Trigger node by setting the msg.reset and removing msg.payload
And all this feeds into the WeMo node to control a WeMo light bulb.
Alexa Home Response
The Alexa Home Response node is for if you want to have more control over the response sent back to the Alexa service. Messages passed to this node need to have orginated from a Alexa Home node as information required to respond to the specific request are attached to that message. To use this node you need to uncheck Auto Acknowledge check box in the Alexa Home input node.
Responses need to be sent within 6 seconds of the incoming request or the service will respond to Alexa with a timeout message.
For TurnOnRequest/TurnOffRequest and SetPercentageRequest, IncrementPercentageRequest, DecrementPercentageRequest requests setting the msg.payload of the input message to true/false to signify success or failure.
For SetTargetTemperatureRequest, IncrementTargetTemperatureRequest, DecrementTargetTemperatureRequest, GetTemperatureReadingRequest, GetTargetTemperatureRequest, GetLockStateRequest request you must also include a msg.extra object.
When the input value is outside the supported range, the msg.extra should look like this:
{
    min: 10.0,
    max: 30.0
}
For a sucessful target temperature change the msg.extra should be simiar to this:
{
    targetTemperature: {
        value: 21.0,
    },
    applianceResponseTimestamp: new Date().toISOString(),
    temperatureMode: {
        value: "AUTO"
    }
}
Combining both of these in a single function node to handle the request would look something like the following:
if (msg.payload < 10 || msg.payload > 30) {
    var range = {
        min: 10.0,
        max: 30.0
    }
    msg.payload = false;
    msg.extra = range;


} else {
    msg.extra = {
        targetTemperature: {
            value: msg.payload
        },
        applianceResponseTimestamp: new Date().toISOString(),
        temperatureMode: {
            value: "AUTO"
        }
    };
    msg.payload = true;
}

return msg;
This enforces a temperature range between 10°C and 30°C, sending the Alexa response to the second output and if the input is in range the control message is sent to the first function output. Note: All values are passed in Degrees C even if the input voice commands are in Degrees F when using Alexa in the US.
To query termostat setpoint with GetTargetTemperatureRequest, respond with a msg.extra similar to this.
{
    targetTemperature: {
        value: 25.0
    },
    temperatureMode: {
        value: "AUTO"
    }
}
temperatureMode values can be AUTO, HEAT, COOL.
For GetTemperatureReadingRequest (the current temperature) a response whould look like this:
msg.extra = {
    "temperatureReading": {
        "value": 21.11
    },
    "applianceResponseTimestamp": new Date().toISOString()
};
msg.payload = true;
return msg;
The applianceResponseTimestamp can be the set to the last time the sensor was polled or in this case just set to the current time.
For Lock device support, both the SetLockStateRequest and GetLockStateRequest can be answered with a msg.extra.lockState of either "LOCKED" or "UNLOCKED" as follows:
msg.extra = {
    lockState: "LOCKED"
};
msg.paylaod = true;
return msg;
Lighting Color (US spelling) needs a msg.extra that contains the hue, saturation and brightness values
msg.extra = {
  achievedState: {
    color: {
      hue: 0.0,
      saturation: 1.0000
      brigtness: 1.0000
    }
  }
};
msg.payload = true;
return msg;
Where hue is a value between 0.0 and 360.0, and saturation & brightness are between 0.0 and 1.0
For Color Temperature commands the response needs to be:
msg.extra = {
    achievedState: {
        colorTemperature: {
            value: 2700
        }
    }
};
msg.payload = true;
return msg;